

The wireless magnetic switch is great for home automation in many ways. For example, knowing when a certain door is open, or maybe turning on the light if door or windows is opened. Another great thing is security features that it can provide, but maybe the coolest use case is installing one on the mailbox so you know when the mailman opens it, and you can get Telegram message, “Post arrived”.
What wireless magnetic switch to chose ?
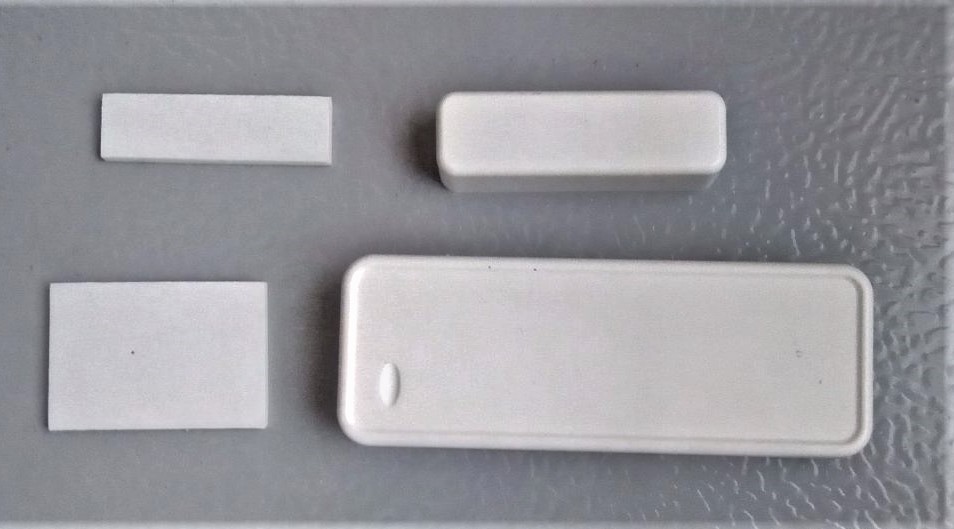
There is one important thing to look for if the sensor is used with Domoticz since there are devices that send the same code whenever state changes (opened or closed). There are also devices that are sending “A” code when closed, and code “B” when opened. That is better since you do not need to track the state based on the assumption of the previous state. This model is one that sends two codes and works with Sonoff RF Bridge. It looks nice, comes with double-sided adhesive tape pre-cut for both sensor and the magnet, and preinstalled industrial-grade AAA battery. You just need to mount it and remove the battery protective sticker so it gets power from the battery.

Switch montage
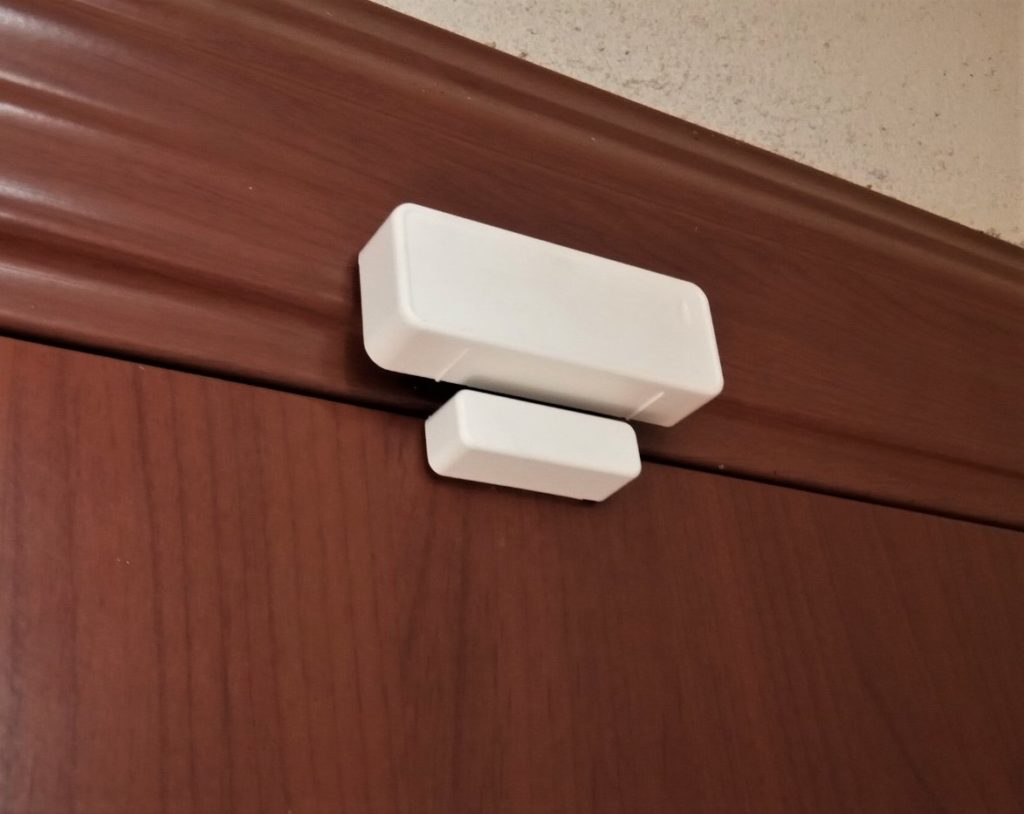
I would suggest that if the possible switch is mounted on the non-moving side and the magnet on the moving side. It means that the magnet (smaller part) should be mounted on the door and switch to the door frame. The reason is simply the avoidance of interference that can occur if the transmitter is moving during transmission.
Add door switch to Domoticz
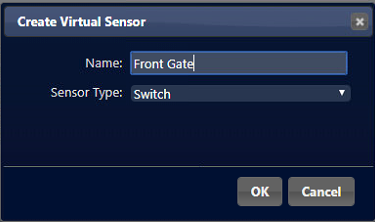
The process is similar to adding a 433 MHz smoke detector. We go to Setup – Hardware and Create Virtual Sensors. Then comes the naming of the sensor. And do not forget to chose “Switch” as a Sensor Type.
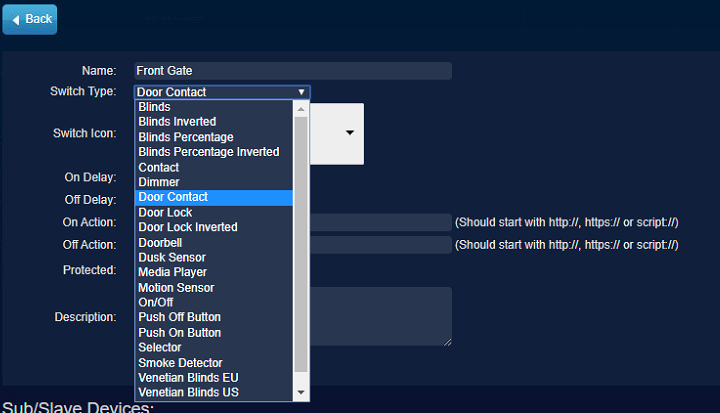
After this, edit switch and select Door Contact as a switch type.
It is now time to link a real-world sensor (hardware) with its digital twin. Go to Setup – More options – Events and prepare to copy the codes that switch transmits. Separate magnet from the switch and it should transmit a signal. In Setup – Log you should see something like this:”2020-02-17 19:14:38.519 MQTT: Topic: domoticz/in, Message: {“idx”:xyz,”nvalue”:0,”svalue”:”9xxxxxx”,”Battery”:100,”RSSI”:5}”
Copy the svalue code to a Notepad or something like that, you will need it soon. Repeat the process for the other code as well. You need both codes.
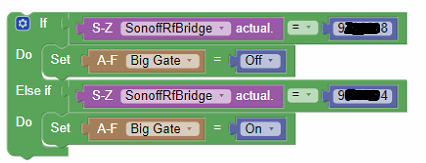
That is how Blockly looks like. Just put your code values and you are ready to go. And of course, you can configure it to notify you when the switch is triggered. Details regarding configuring this are in the “Smoke detector” article.
Thanks to Dr_ Kosh here is the same thing for DzVents….
return {
	on = {
		devices = {
			yy --yy is idx of your rf bridge
		}
	},
	execute = function(domoticz, device)
	    local doorSwitch = domoticz.devices(xx)  --xx is idx of your virtual switch
	   	if(device.state == 'OnCode') then --Change OnCode with your actual code
		    doorSwitch.switchOn()
		end
			if(device.state == 'OffCode') then  --Change OffCode with your actual code
		    doorSwitch.switchOff()
		end
	end
}
This may come in handy if you have multiple door switches, so just expand the code following the same logic.
One more tip…
Just to mention, if for some reason there is not enough space for the smaller magnetic box of the switch, you can use almost any magnet. The first picture shows switch mounted on my door and space was to thin for the original magnet. So I used a magnet from the hard drive since it’s very small and strong and it does the same job.
If you find this article interesting there is more in the Home Automation category. Once more, thank you for reading, and if you have any questions regarding the subject, just post a comment.