

It`s extremely important to have a piece of critical information, right on time. So, it`s great to have an option to be remotely alerted in case of fire or smoke at your house. I`m thinking Telegram… E-mail… and … Domoticz in combination with C50W 433 MHz smoke detector.
So, this article is about choosing and adding a wireless smoke detector to Domoticz. In this example, we used C50W 433 MHz wireless device. No, it does not mean Wi-Fi, but wireless 🙂 There can be a big difference since Wi-Fi is wireless, and wireless does not necessarily mean that it is Wi-Fi.
Wi-Fi vs Wireless
Wi-Fi is a family of wireless networking technologies, based on the IEEE 802.11 standards. In general, it is intended for use in short-range networking of computers, smartphones, and other devices. On the other hand, wireless means that the device can transmit and/or receive something without cables (wires). For example, a walkie talkie is wireless but not Wi-Fi. Then there is a wireless charger. Not to forget our 433 MHz smoke detector that is wireless, and not Wi-Fi. The main reason is the much lower energy consumption. You definitely do not want to change the battery in your smoke detector on a weekly routine.
Back to original theme, adding sensor to Domoticz
First of all, for this to work you need some kind of 433 MHz RF Bridge already setup and working with Domoticz. I Use SONOFF RF Bridge, flashed with Tasmota firmware. RF bridge is both transmitter and receiver on 433 MHz but also has Wi-Fi connectivity, so it talks with Domoticz over Wi-Fi. This Sonoff device is great, and yet under 10 $. After that, you obviously need a 433 MHz smoke detector. I`m using these ones. It is marked as C50W and it costs around 10$. A short piece of advice, there are many devices out there marked as 433 MHz. And manufacturers are not lying about it. The trick is that they use some proprietary or nonstandard protocols, which means they may or may not work with third-party devices. You will need to do some research before buying it.
Configuration of C50W
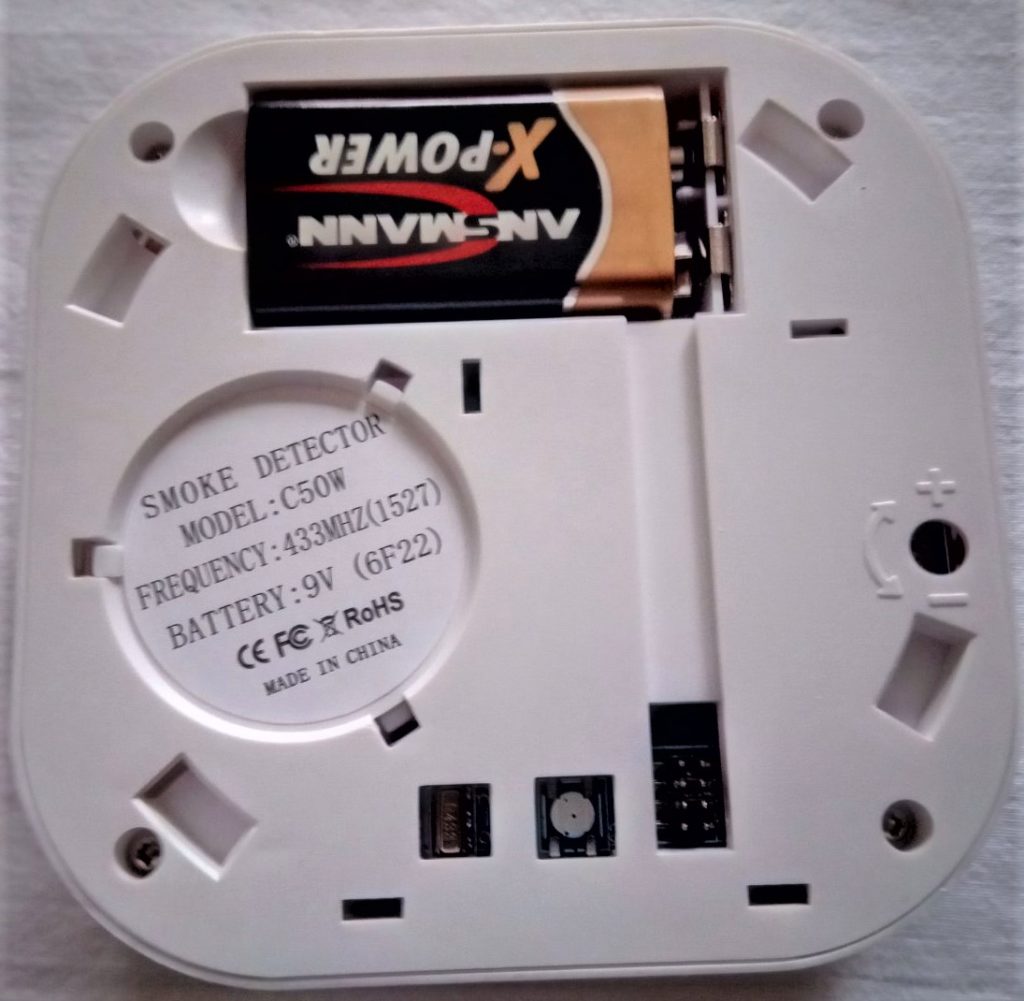
This pretty little thing comes with a terrible, unusable manual. It also comes without the battery so prepare a quality one. Do not even try to test or use it with a used 9V battery. When the time comes to change the battery it will start beeping at 45 seconds interval and note: it will not give you an audible alarm or send any signal on RF. There are also four jumper places with two jumpers placed in the middle. Their intent is to change electrical resistance and the code it sends over the radio. If you ask me how to place those jumpers I would say that I do not know. Just leave them be for the start. There is a little hole for adjusting sensitivity to smoke, and that also has a great range. You can play with it to adjust it to your needs if you want.
Add C50W to Domoticz
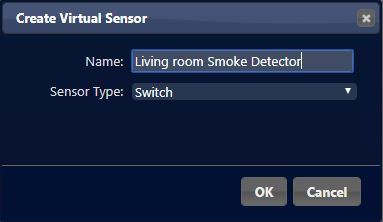
First of all accept “virtual sensor” as a term, since most things you add to Domoticz are represented by VS. If it`s easier observe it as a virtual representation of physical sensor, or its digital twin. Since this kind of device has a normal state, where nothing happens, and an active state where the alarm is triggered, the default state is normal. This means that the state will change only if it detects smoke. So we kind of have a two-state thing, and it may remind us of a ….. switch? True! So let us start with a virtual s… .

Next chose a Switch as a sensor type, and name it as you wish.
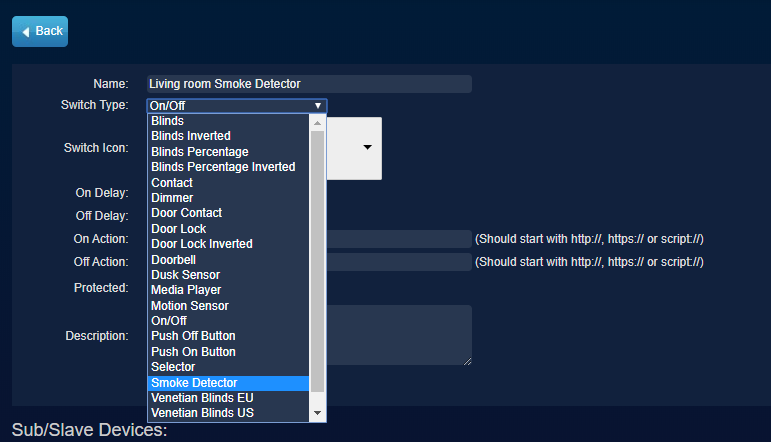
After that find your switch under switches tab and click on edit.

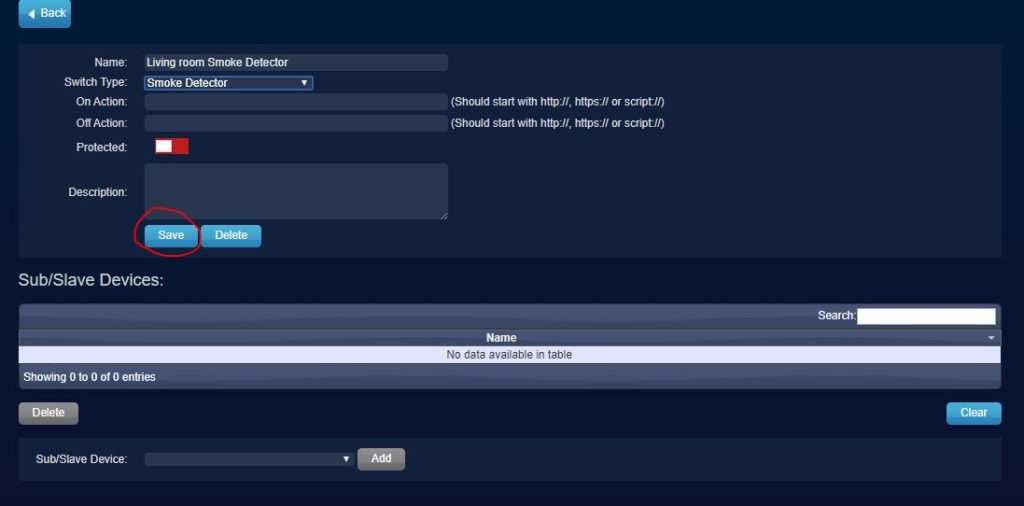
The whole new world of switches opens up there. We are aiming for the smoke detector.
Connecting physical and virtual worlds or joining the digital twin to its physical brother
Let`s summarize what we did and what needs to be done. We created a virtual switch that serves as a representation of the real one. What is missing now? A link between them. We mentioned before that C50W sends some kind of code on 433 MHz when activated. What is needed is to intercept that code, and link it to changing state of a virtual switch.
What is going on with RF Bridge
Quick reminder of how RF bridge works. Whenever it detects 433 MHz signal or if you like it more, commands, it reports it to Domoticz via MQTT. It means that you can find that exact code in Domoticz log file, and it looks something like this.

So this is the code that my C50W will send if activated. Just to mention, you do not need to set fire to discover the code. The big round thing in the middle of the sensor is a test button. When pressed for a few seconds it will simulate triggered alarm and you will get your code transmitted 🙂 .
Time for some blockly work
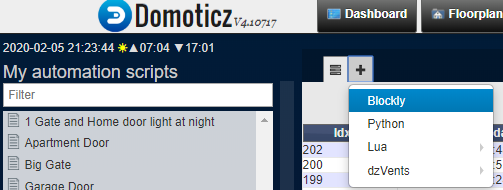
Now we go to Setup – More options and Events and create a new Blockly script.
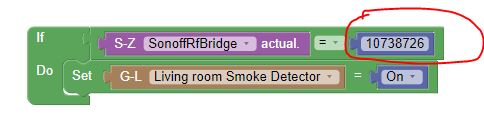
I do not think that this needs much explanation. In short, if the RF bridge detects the value of “x” then set the state of a Smoke detector switch to On. X is a value that you read in your log file. And that is it, ready for testing.
Pressed the test button on C50W and voila…
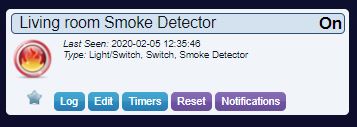
Now the real power comes in. We go to notifications on switch widget and set some alerts.
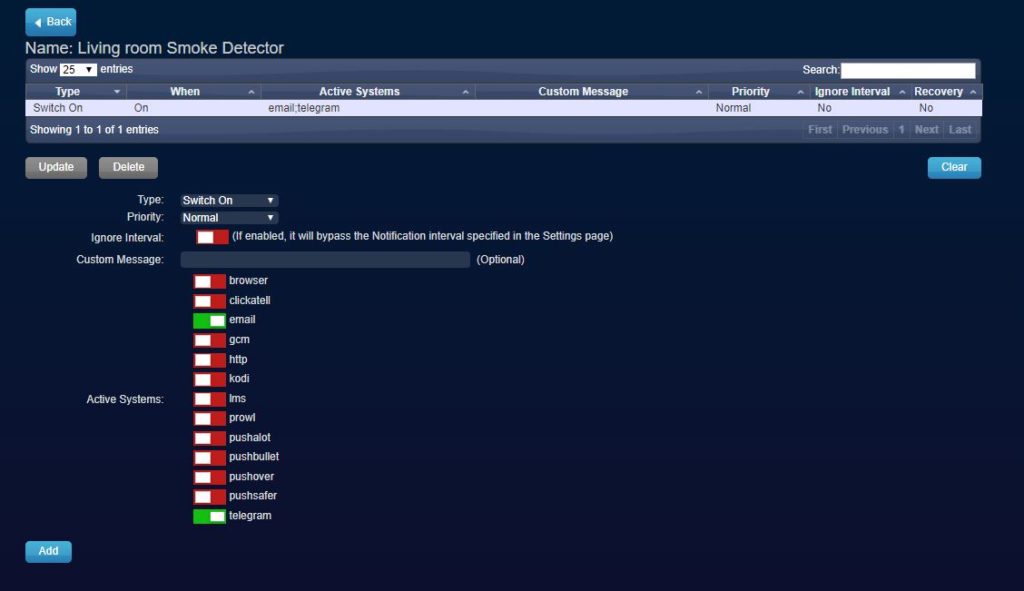
I prefer these two types of alerts. Since this is a critical sensor, Telegram is the first choice as it is delivered instantaneously, and email….. email is just in case. Of course for these to work you must configure them in Domoticz settings, but it is not a big deal. Now if god forbid there is smoke in your house, Domoticz will message you.

If you find this article interesting maybe you should check on this one regarding building a sensors station for Domoticz. Thank you for reading, and if you have any questions, just post a comment.

P.S. I wanted to put the picture of a detector on the ceiling, but it kind of looks stupid. If angle is wide enough to get real impression that it is actually detector on the ceiling than it looks like a little spot, almost undetectable. If it is close enough to have a descent look at the detector than it looks same like on the table 🙂
10 comments
I am using an RFLink and it is not in the list of devices in Blocky. can you help me? because I have exactly this smoke detector and been searching for days. thanks in advance
Huh, of course, I would like to help but I have no experience with RFLink (I use Sonoff rf bridge) but the principle should be the same…..
When adding rf bridge to Domoticz you Create a new dummy device – Usage electric , write down its IDX , and than login to tasmotised rf bridge and configure its mqtt , idx and domoticz ip address. Then you should be able to see it as a device in Domoticz, and in Blocky also. I hope this helps…
It works and I am happy, thank you for this clear explanation!
No problem, I`m glad it helped.
Cheers 🙂
Hello Chief,
thank you for this very good and detailed instruction. it helps me a lot.
One Question, and i hope you can help me:
in the detector decription i find this: Supports 3 alarm ways: Independent sound, light&sound alarm, wireless 433 transmission
Is there a way to aktivate only one way fpr the alarm? e.g only wireless 433 transmission.
i need a “silent” alarm, only via notification
best regards
Marco
Hi Marco,
I do not think that there is that option for this kind of detector. There is a jumper on the backside but I do not think it can make a detector work as you would need. There is a workaround for this problem, and you should open the detector and disconnect things you do not want to work. For example, you do not want visual alerting, you disconnect LED, you do not want sound alert you disconnect piezo/siren. It is not a big deal, to do it, just unsolder or cut one pin for each alert type. I think that would do you the trick, but beware that that way you would lose battery change warning as it is a visual/sound warning. I hope this helps you, and let me know if you need further assistance with this, as I will do my best to help more. Thanx for reaching out. Chief
Hi, I got a lot of fun and peace from your plan and explanation. It works well. And now I want to continue in Domoticz but I get stuck. Maybe you know an answer? I want to make a motion sensor at the top and bottom of the stairs and switch the lamp with it. So when imeand walks upwards sensor 1 sees me and switches the ladp on, then when sensor 2 sees me it switches the lamp off where and vice versa. Do you know if this is possible with Blocky? I’ve already searched a lot but can’t find it online. Thanks in advance and a happy New Year!
Hi Roland,
I think this one is beyond the comments section but I will try to help 🙂
First, there is a question of how long does it usually takes to run the stairs from one side to the other, as it would affect the code, but to oversimplify it.
I will try to help with this much info. First, your idea is more elegant but for a start, I would just make both motion sensors turn on the lamp for example for 60 seconds.
It would give you time to walk the stairs and then the lamp would shut down. It would do the job, and it is easier.
But it is not the way you want it…
I`m not quite sure that it is possible to do it your way with Blocky, but you may try, there is fun in doing it and I will try to give you some pseudo-code as a start.
You would need 2 variables of boolean type, but since I think user variables in Domotics cant be bool, use just integer, it can do the job.
We will call them var1 and var2.
We will call motion sensors sens1 and sens2.
So logic would be like this
For start we set both variables as 0
var1 = 0
var2 = 0
if sens1 = on
var 1 = 1
if sens2 = on var2 = 1
if var1 = 1 and var2 = 0
turn on lamp
This is for going from one side of stairs
if var1 = 1 and var2 = 1
turn lamp off
This means that you came to the top of the stairs
if var2 = 1 and var1 = 0
turn lamp on
This is for going from other side of stairs
If var2 = 1 and var1 = 1
turn lamp off
set var 1 and var 2 to 0 again at the end
This will of course need some timers or delay added to work and to not auto-reset itself but you will figure it out.
Of course, there are many ways to do it, this is what first came to my mind.
Anyway for something like this I would suggest using something more flexible as programming languages like DZvent or Lua or Python…
I hope this gets you started and please report back when you solve it.
Happy New Year and may it be better than the pas one for all of us.
Chief
Friend!
Thank you very much for your help, I really appreciate this. Through another user I got a DZ Vents (script). I don’t understand it but it works like a charm! Thank you again, I wish you and your loved ones good luck and of course health in 2021. Kind regards from the Netherlands
Roland
That is great!
Stay safe my friend!
Best wishes from Bosnia and Herzegovina!