

Now we configure Domoticz to use Mosquitto as MQTT broker.
Open Domoticz web site in your browser. If you are working on the same computer where you installed Domoticz and Mosquitto than the address is http://localhost:8080 . If you are gonna access it from another device than the address will be something like this, with your IP address. http://IpAddressOfTheComputerWhereDomoticzIsInstalled:8080 Do not hold a grudge on me for writing it this way, there are people new in all this and sometimes this level of simplicity and details helps.
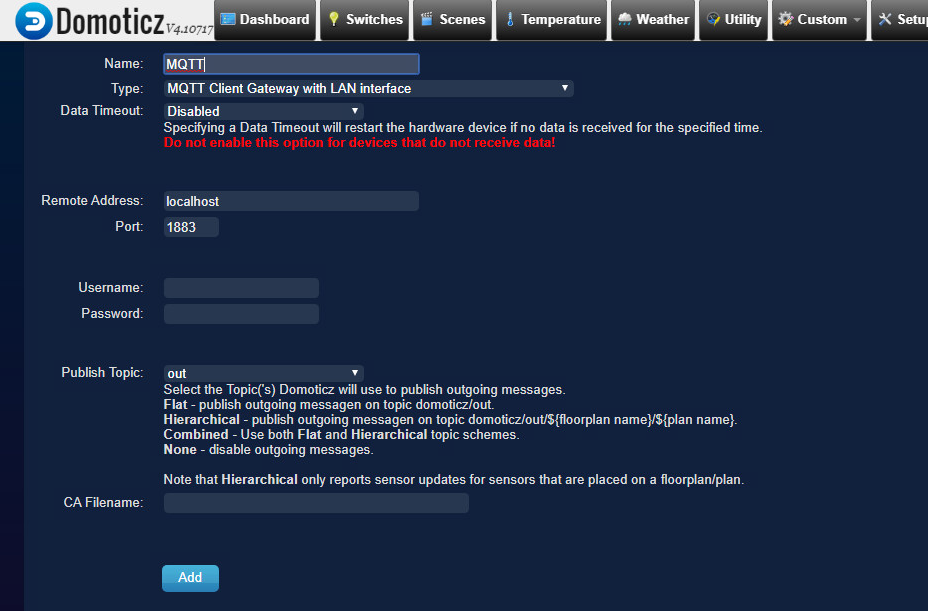
In Domoticz web page go to Setup, then Hardware and under name write something logical like MQTT and under type chose “MQTT Client Gateway with LAN interface”. The remote address is localhost since both are on the same machine and port number is 1883. Data Timeout is “Disabled”. Leave the Username and Password empty (if you need extra security you can change this later). Set publish topic to “out” Click add and that is it. It should look like this picture.
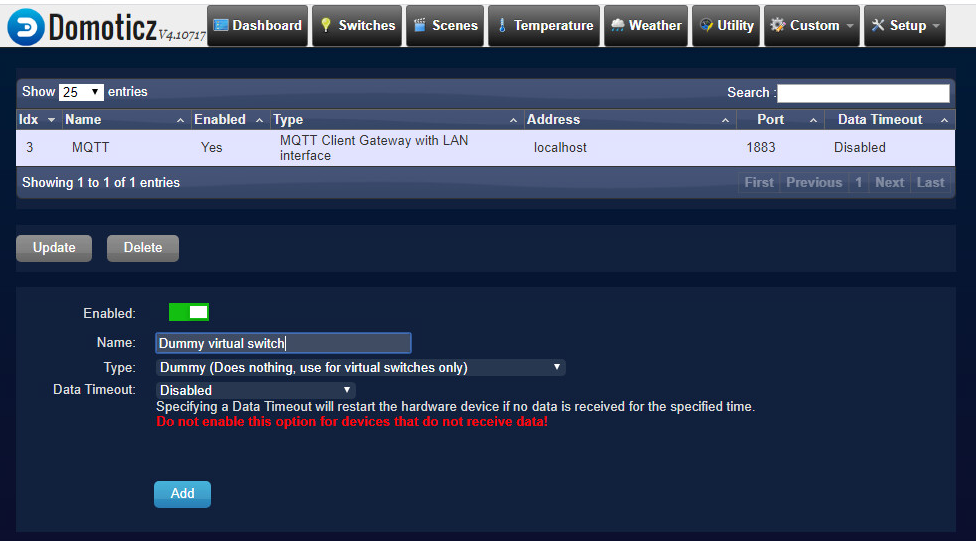
Since you are already there add one more device, it`s gonna be needed later. Write something as a name (for example dummy or dummy virtual switch) and as a type chose Dummy (Does nothing, use for virtual switches only). Now, leave Data timeout as disabled and click Add. It looks like this.
Later you will create virtual sensors on top of this dummy. Sounds funny, right? 🙂 Now you should have Domoticz and Mosquitto on Windows up and running. Now it is time to enable and configure a firewall to allow used ports and services. It is not a mandatory task but a friendly suggestion.
That`s all folks. If you find this interesting, there is more in the “Home Automation” category. Thank you for reading, and if you have any questions, post a comment.