This time we will Tasmotise Sonoff TH Elite device. Description and technical data of the device shall be skipped since it can be read on the manufacturer`s site.
It is a pretty straightforward process and I must say that I like this device in all aspects.
On this occasion, I got my hands on TH Elite together with THS01 Temperature and Humidity sensor, so here we go…
Flashing the Sonoff TH Elite
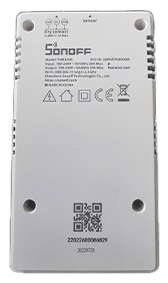
On the back of the device, there are four Phillips screws, remove them and open the device.
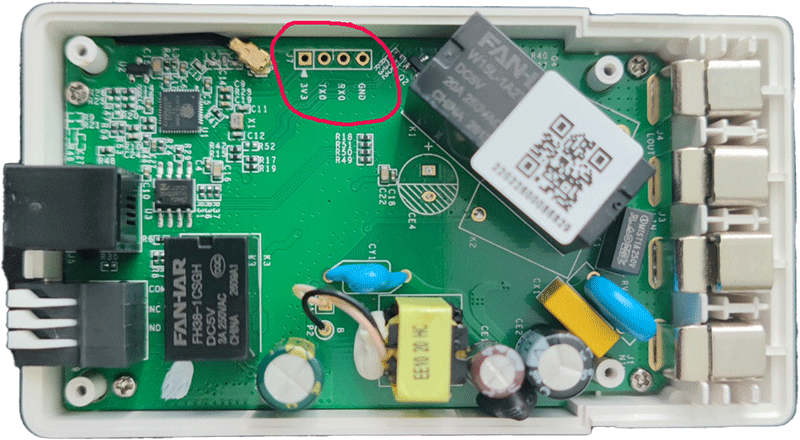
When you open the device, you will notice pins for programming. You need USB to TTL adapter. Just do not forget that TX from the adapter goes to RX of the device and TX of the device goes to RX of the adapter. It is just like talking and listening, one talks with his mouth, and the other listens with his ears, and vice versa 🙂 3.3 V goes to 3.3 volts of adapter (if you have the adapter that is capable of both 3.3 and 5 Volts be sure to use 3.3) and Ground to the ground.
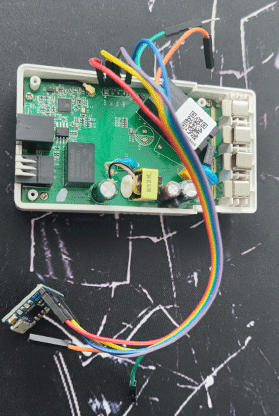
Solder the wires, and it is ready for flashing. Flasher can be downloaded from here
and firmware from Tasmota site. You need tasmota32.bin (not the other, just that particular one).
Now it is important to put the Sonoff TH Elite into flashing mode. We do that by pressing and holding the button on the device while plugging the USB to TTL adapter into the USB port of the computer. When plugged release the button and as a result device should be in flashing mode. Chose your com port, and browse to tasmota32.bin path and that`s it. Hit the Flash button, and it should end like this.
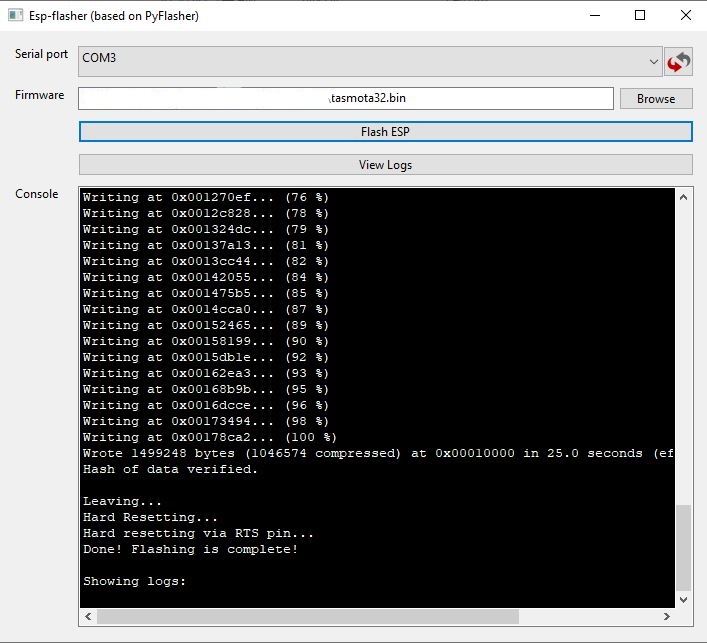
If you get the error, most probably ESP is not in flashing mode. Remove the adapter from the computer’s USB port, press and hold the button on the device and plug in the USB to the computer again. After a few seconds, release the button and try flashing again.
Connecting tasmotised device to home network
Now it is time to connect to the device and configure it.
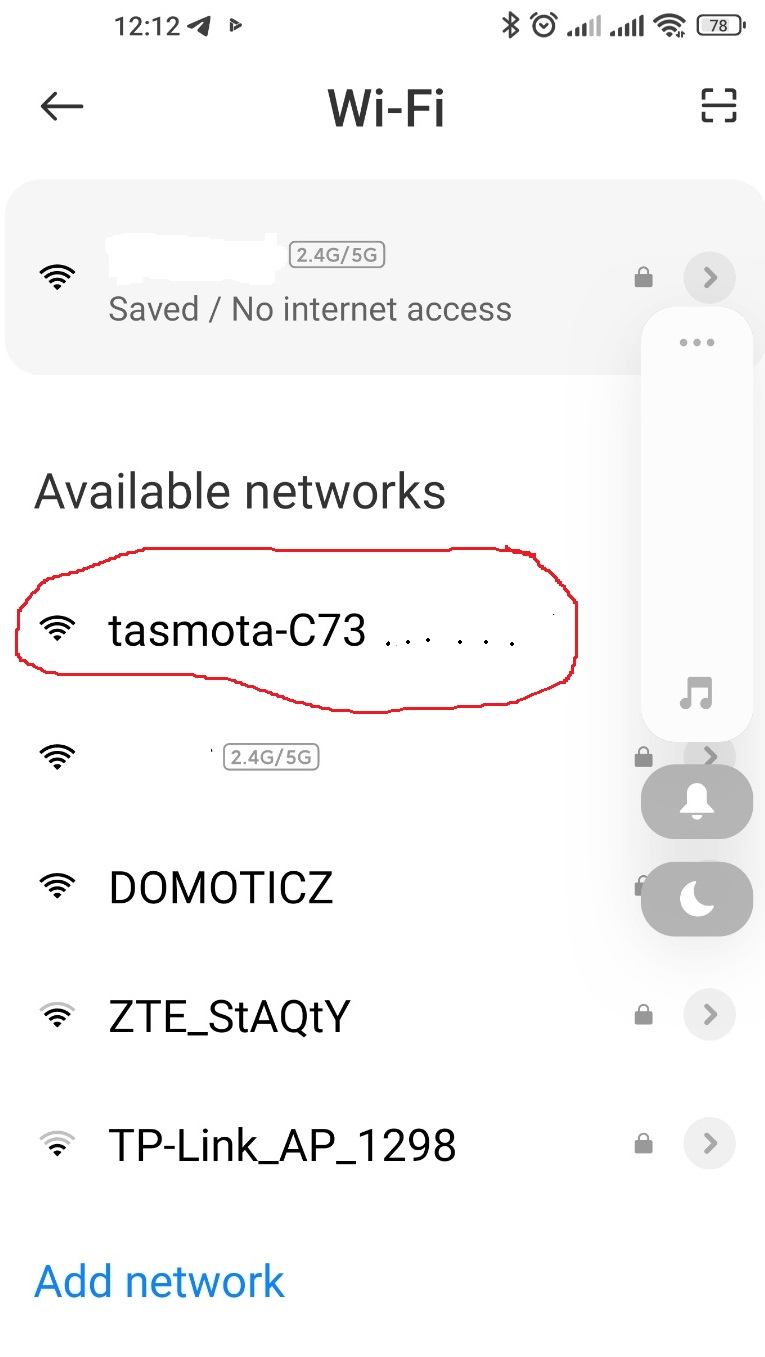
Tasmota Wi-Fi config
Now, get the phone or laptop and scan for Wi-Fi networks. It is wise to turn off mobile data transfer if you are using your phone since sometimes it makes some problems. There will be a tasmota-something network and connect to it. In addition, open your browser and enter 192.168.4.1 in the address bar.
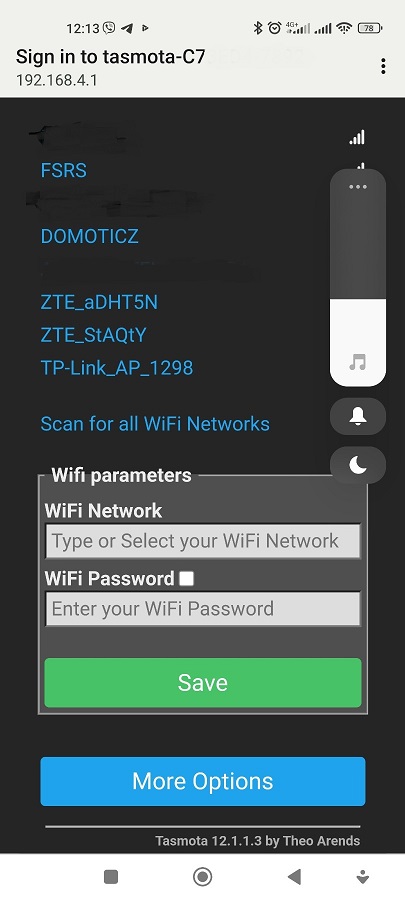
Tasmota Wi-Fi config
First chose your Wi-Fi network SSID and enter a password for it. Watch the browser because when it connects to your Wi-Fi it will show you its new IP address. Secondly, write it down or remember it. Third, connect your phone or laptop or whatever you are using back to your home network and enter that IP address in your browser.
Configuring module
Now you go to configure and configure other and paste this into Temlate:
{“NAME”:”Sonoff THR320D”,”GPIO”:[32,0,0,0,226,9280,0,0,0,321,0,576,320,9184,9216,9312,0,0,9313,9248,0,1,0,3840,0,0,0,0,0,0,0,0,0,0,0,0],”FLAG”:0,”BASE”:1}
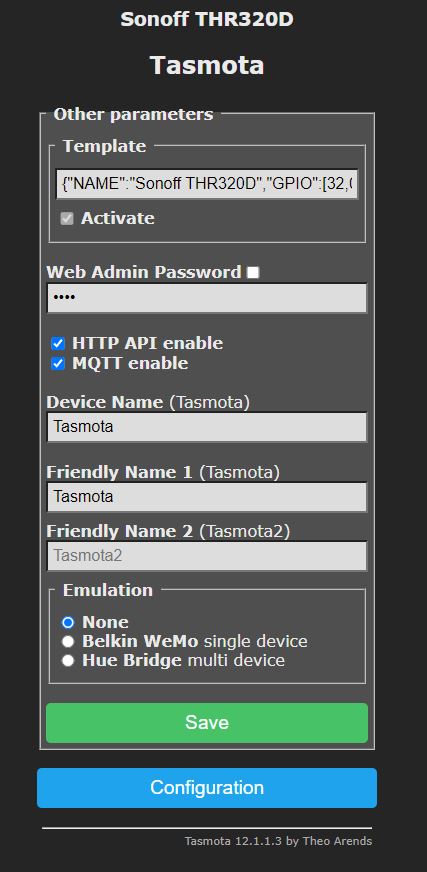
Module configuration
Select activate, further save. Afterward, the device will reboot.
After that, go to Configure, Configure Template.
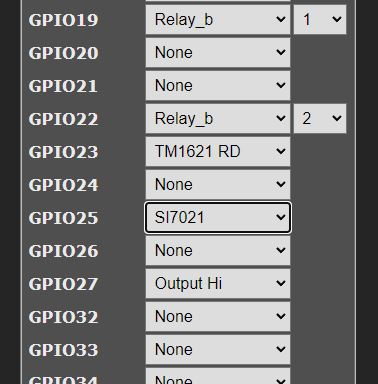
Configure Template
Under GPIO25 find Si7021. Si7021 is the actual name of the temperature and humidity sensor that Sonoff calls THS01. You will not find THS01 in tasmota configuration. After that save the configuration. That is it you are ready to roll.
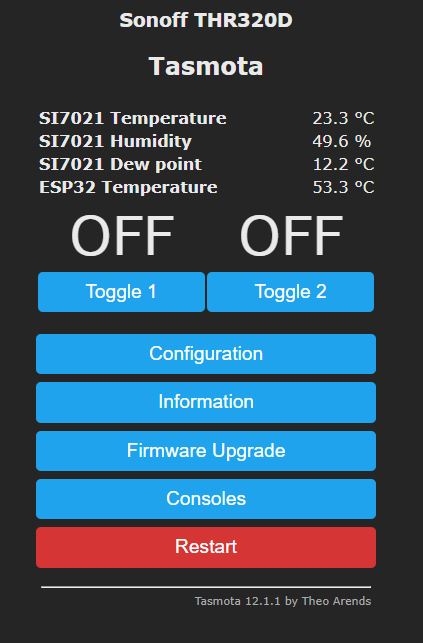
Sonoff THR320D with Tasmota
The device LCD works and displays temperature and humidity, controls from tasmota work also.
Now it is up to you, how to use it. I personally like to configure it for MQTT and Domoticz, but this device has many uses….
If you like this article and want to learn how to link similar device to Domoticz you can read about it in “DIY server room monitoring” article.
Thank you for reading.

🙂

2 comments
when i clikc on the Flash button to upload the firmware then it will show me the error
Using ‘COM5’ as serial port.
Connecting………………………………..
Unexpected error: ESP Chip Auto-Detection failed: Failed to connect to Espressif device: No serial data received.
For troubleshooting steps visit: https://docs.espressif.com/projects/esptool/en/latest/troubleshooting.html
can you pease help in this.
Sorry for late response,
Well there are few things that could do this.
If your usb to ttl is indeed on com5 (please check in device manager if you did not), than you check did you connected it so tx of adapter goes to rx on device, and vice versa.
If first two checks are ok, and you have 3.3 V and ground connected, only reason that I can think about is that you did not put device (ESP) in to the flashing mode. Here is a copy of that part again “Now it is important to put the Sonoff TH Elite into flashing mode. We do that by pressing and holding the button on the device while plugging the USB to TTL adapter into the USB port of the computer.” So basically you turn the device off, and press the button and then you plug it to power while holding the button. after few seconds you release the button and try to flash it.
Let me know when you check all this and try again.
Cheers,
Chief