Wondering how to add an SDS011 air quality sensor with Tasmota to Domoticz? Here is a step by step guide how to do it.
First, we need to start with the Tasmota configuration. In addition, let`s just assume that we have a hardware sensor like this built. Above all, now we need to configure it.
Flashing ESP8266 with Tasmota Firmware
It is easy so I`l make it as short as possible…
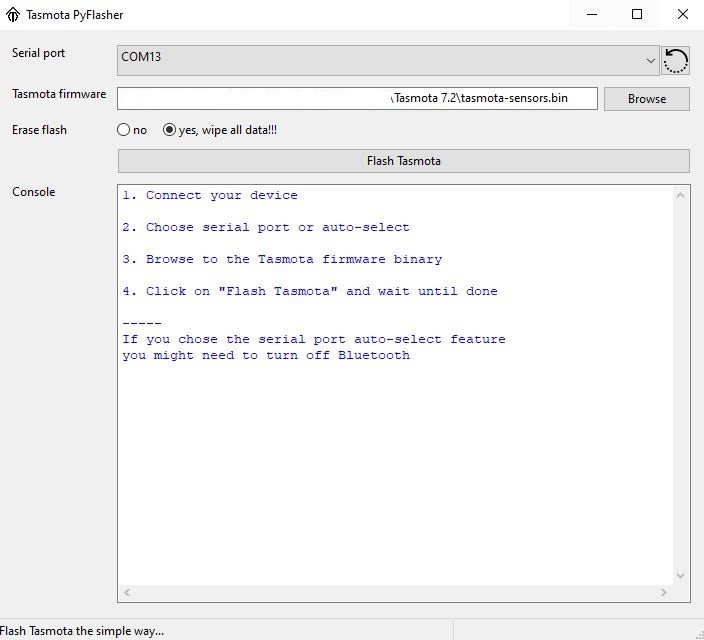
Here are a flasher and 7.2 version bin if you want to start right now. 1. Connect ESP to your computer, figure out what com port is it using and configure Tasmota flasher accordingly. 2. Press taster for entering flashing mode and then press the reset taster on the ESP dev. board. 3. Release the reset taster, and then release the first taster on ESP. 4. Select the tasmota-sensors.bin in flasher and then send it to the device.

Find a comport assigned to ESP 
Chose location of tasmota-sensors bin and comport 
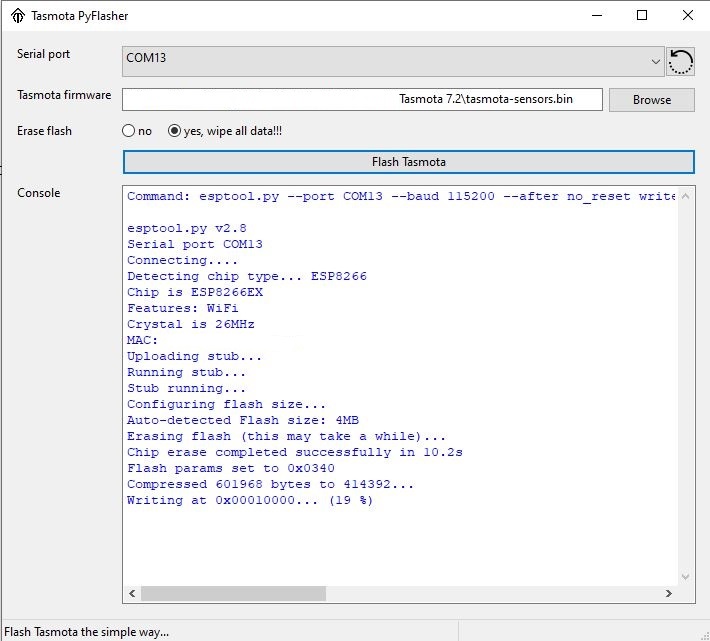
Hit “Flash Tasmota” 
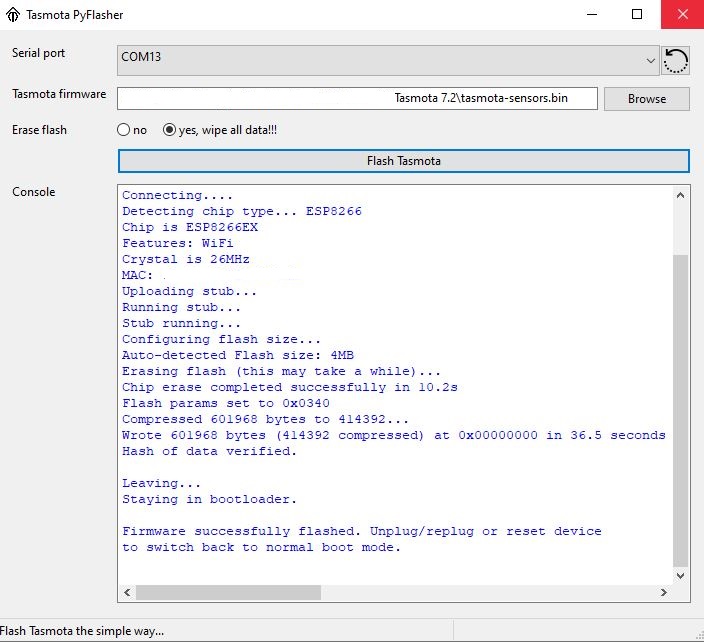
Wait for it to finish flashing
Wi-Fi configuration
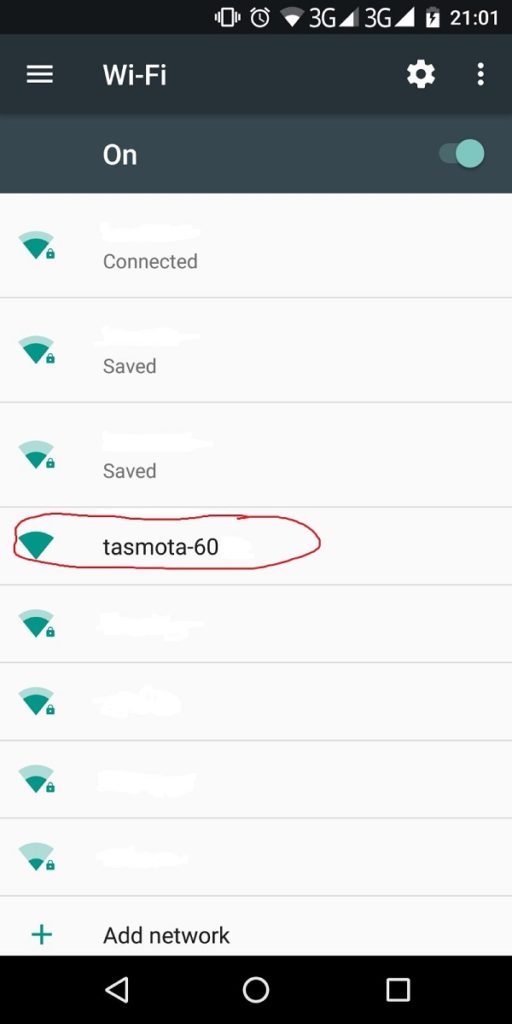
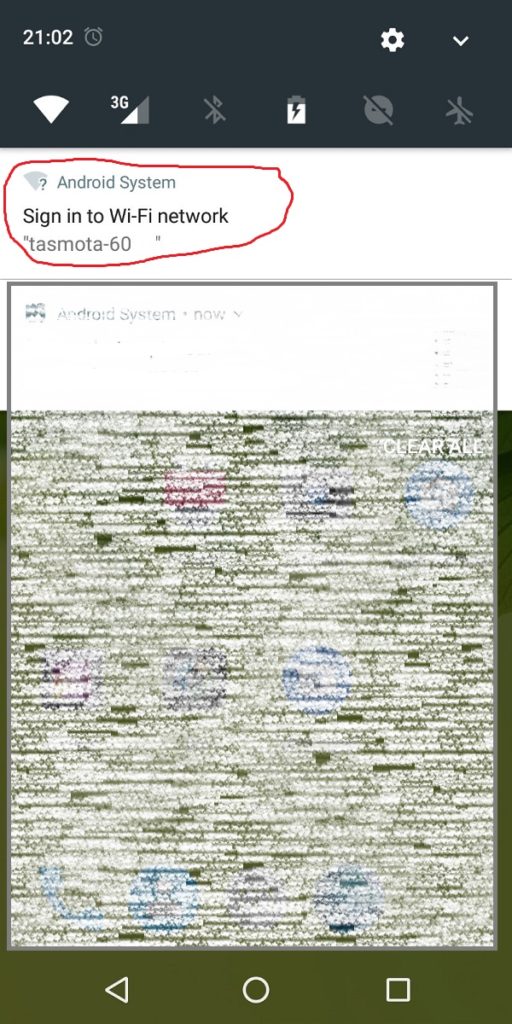
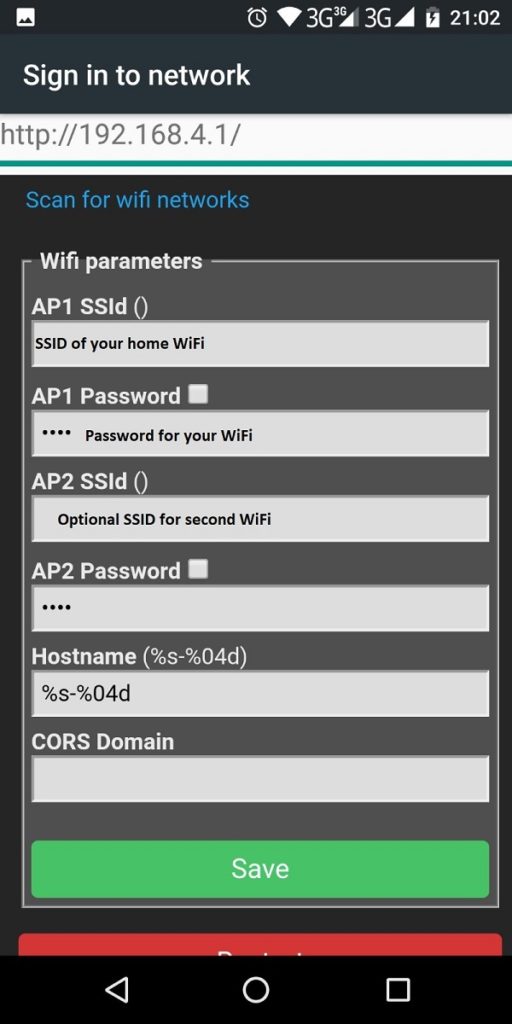
Further, after flashing just do a regular reset and you are ready for initial configuration. Therefore you need to connect to Tasmota via WiFi as it now acts as a hotspot. For instance, you could use your smartphone to scan for available WiFi networks and you should see one with “tasmota” in a name. Connect to it and it will show you “sign in” message. Click on sign in and it will open Tasmota configuration site. Here are screenshots in a gallery.

Scan WiFi and chose Tasmota-something network 
Click “Sign in” as it will send you to config… 
Configure Tasmota to connect to your WiFi
When flashed and configured, here is how Tasmota web interface looks like. Just find its IP address on your DHCP server (it will be shown as tasmota-ACB or something like that) and enter that IP address in your browser. It is nice to make a reservation (or static assignment) on DHCP so the address stays the same. On that interface, you can basically read values from the sensors and configure, backup or upgrade Tasmota.
Configure Tasmota Module for the sensors
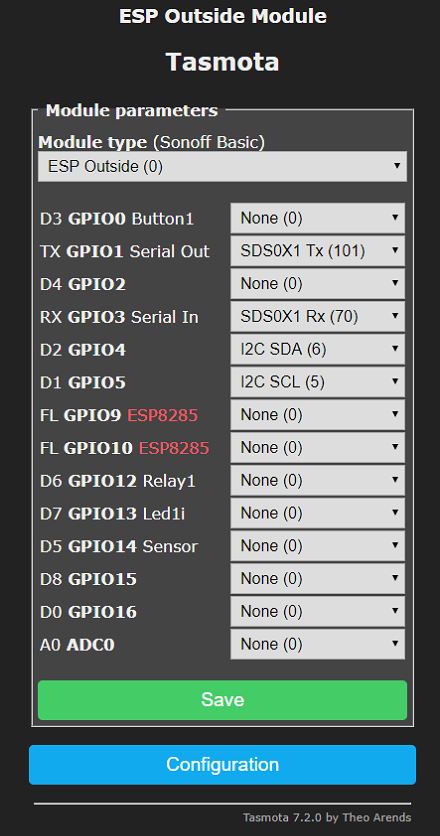
This should be easy. SDS011 is connected to the Rx and Tx ports of the ESP board. Above all, remember that Rx and Tx need to be crossed (Rx goes to Tx, and Tx goes to Rx). Imagine it like talking. When You talk (Tx)then I Listen (Rx), and vice versa. We are talking about wire connections right now. Now we move to a logical connection. For TX (GPIO1 serial Out) chose from the drop-down menu SDSx1 Tx(101), for the (RX GPIO3 Serial In) chose SDS0x1 Rx (70). In this example, I connected more sensors. It means more pins need configuration. For more info about wiring go to this article.
Configure Tasmota to send data to Domoticz
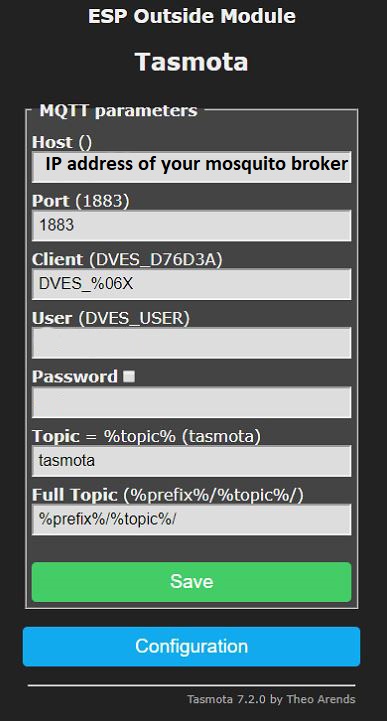
First of all, Tasmota is not gonna talk directly to Domotics. Therefore you need to have an MQTT broker up and running. Moreover, in most cases, it is a Mosquito and it is installed on the same machine as Domoticz. Under this assumption, we will continue configuring Tasmota. On the MQTT menu, you only need to edit the first field named Host(). There you enter the IP address of your MQTT broker. If it is installed on the same machine as Domoticz than IP address is the same. If you left everything on default values during Mosquito and Domoticz setup, no need to do anything else here.
Configure Tasmota and Domoticz in pairs
This part can be a little tricky if you do not know how MQTT, and Domoticz work, but I will try to make it clear and in pairs, so it is easier to understand it. First, we will deal with SDS011. Since it has readings of PM 2.5 and PM 10 we will need to create two virtual sensors. Moreover, since the process is the same only one will be shown here. You go to Domoticz website- Setup menu in the top right corner then hardware, and after that chose “Create virtual sensor”.

Then you name it PM 2.5 since it will be for that sensor data, chose “Custom sensor” from the drop-down menu, and add “μg/m3” as axis label as these are the units that sensor actually measures.
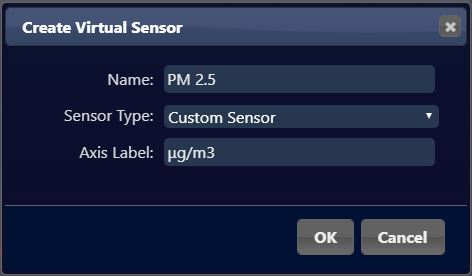
This virtual sensor is gonna display data from the SDS011 physical sensor. Meanwhile, next thing to do in Domoticz is to go to Setup/Devices and check the “idx” of the newly created sensor. You can find it at the end of the list or by searching for its name.

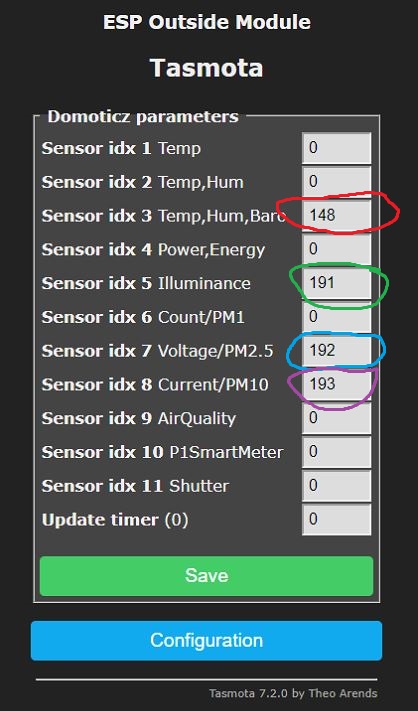
It`s time to follow this setting in the Tasmota Domoticz menu. Idea is to configure tasmota`s predefined value (in this case Sensor idx 7 Voltage/PM2.5 with idx of the newly created virtual sensor named “PM 2.5” in Domoticz. So we enter the value of 192 to that place.
Configure Tasmota for Domoticz
Further, I will explain the creating and mapping of a Temp+Hum+Baro virtual switch. Proces is the same, create virtual switch but this time chose like this:
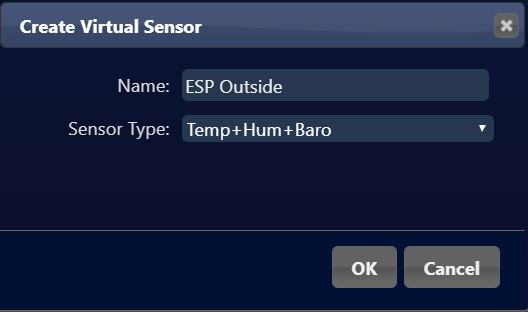
Again check the idx of the virtual sensor on Setup/Devices menu

After that, we go back to the Tasmota page and into Domoticz menu and this time set the value of the ” Sensor idx 3 Temp,Hum,Baro” to 148. This has to be repeated for every sensor added, on both sides!
How it looks in Domoticz

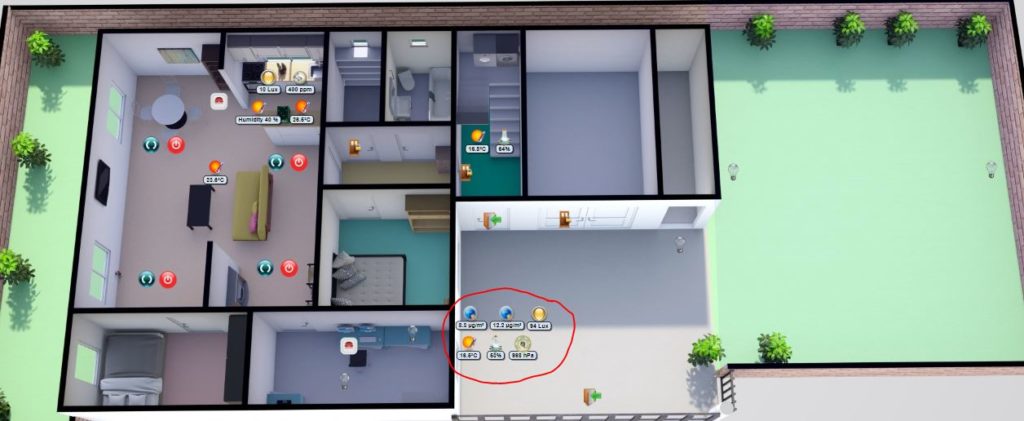
House plan with sensors 
Lux virtual sensor 
PM 2.5 virtual sensor displaying data from SDS011 
Temperature humidity barometer virtual sensor 
PM 10 virtual sensor displaying values from SDS011 sensor 
Lux sensor week log 
Temperature and humidity week log 
Barometer week log 
PM 2.5 week log displaying data read from SDS011 sensor 
PM 2.5 week log displaying data read from SDS011 sensor
If you find this article interesting maybe you should check on this one also. Once more, thank you for reading, and if you have any questions or need help, just post a comment. I’ll get in touch with you asap.


